
Today I want to share with you a new, quite clever
creation. I admit it, the idea is not mine (ouch!), but I was inspired by
Pinterest (see the original pin here). All you have to do is get a wine
glass and flip it to make a candle holder. How simple and smart is that?
When I
first saw it I was so impressed, that I literally ran to look for an odd, old
wine glass and started working, personalizing the idea with crackle effect,
decoupage paper, felt and burlap… Do you want to try too? Just follow the
step-by-step instructions below and you can make your own original center piece
for your Christmas table…enjoy!
You will need:
- A wine glass
- A flat cardboard or plastic circle (I used a plexiglass sphere’s separator)
- Glass Primer
- Background acrylic paint (I used a gold color)
- Foreground acrylic paint (I used ivory)
- Crackle medium
- A Christmas image (I got mine from Calambour paper RP73)
- Decoupage glue (Mod Podge should be ok)
- Clear sealer
- Liquid bitumen (or any other medium that will give an antique look to the piece)
- Decorations (flowers, berries, ribbons…)
First of all, you
will have to brush the outside of the glass and the top of the circle with (in
order): glass primer, gold acrylic paint (2 coats work better than 1, see image
2 below), crackle medium, ivory paint (1 coat only, the second coat would not
crack!), letting, of course the products dry between coats.
Next, I applied the
decoupage image, using the appropriate glue and I let it dry, before covering
everything with a clear acrylic sealer. I then centered and glued (using a hot glue
gun) the glass to the circle. With a sponge I applied a very thin layer of liquid
bitumen to the surface and, when it dried, I added some ribbons and flowers as decorations
(you can see how to make the felted poinsettias in the beautiful tutorial here ...and maybe, you will end up also making the stocking, as I
did).
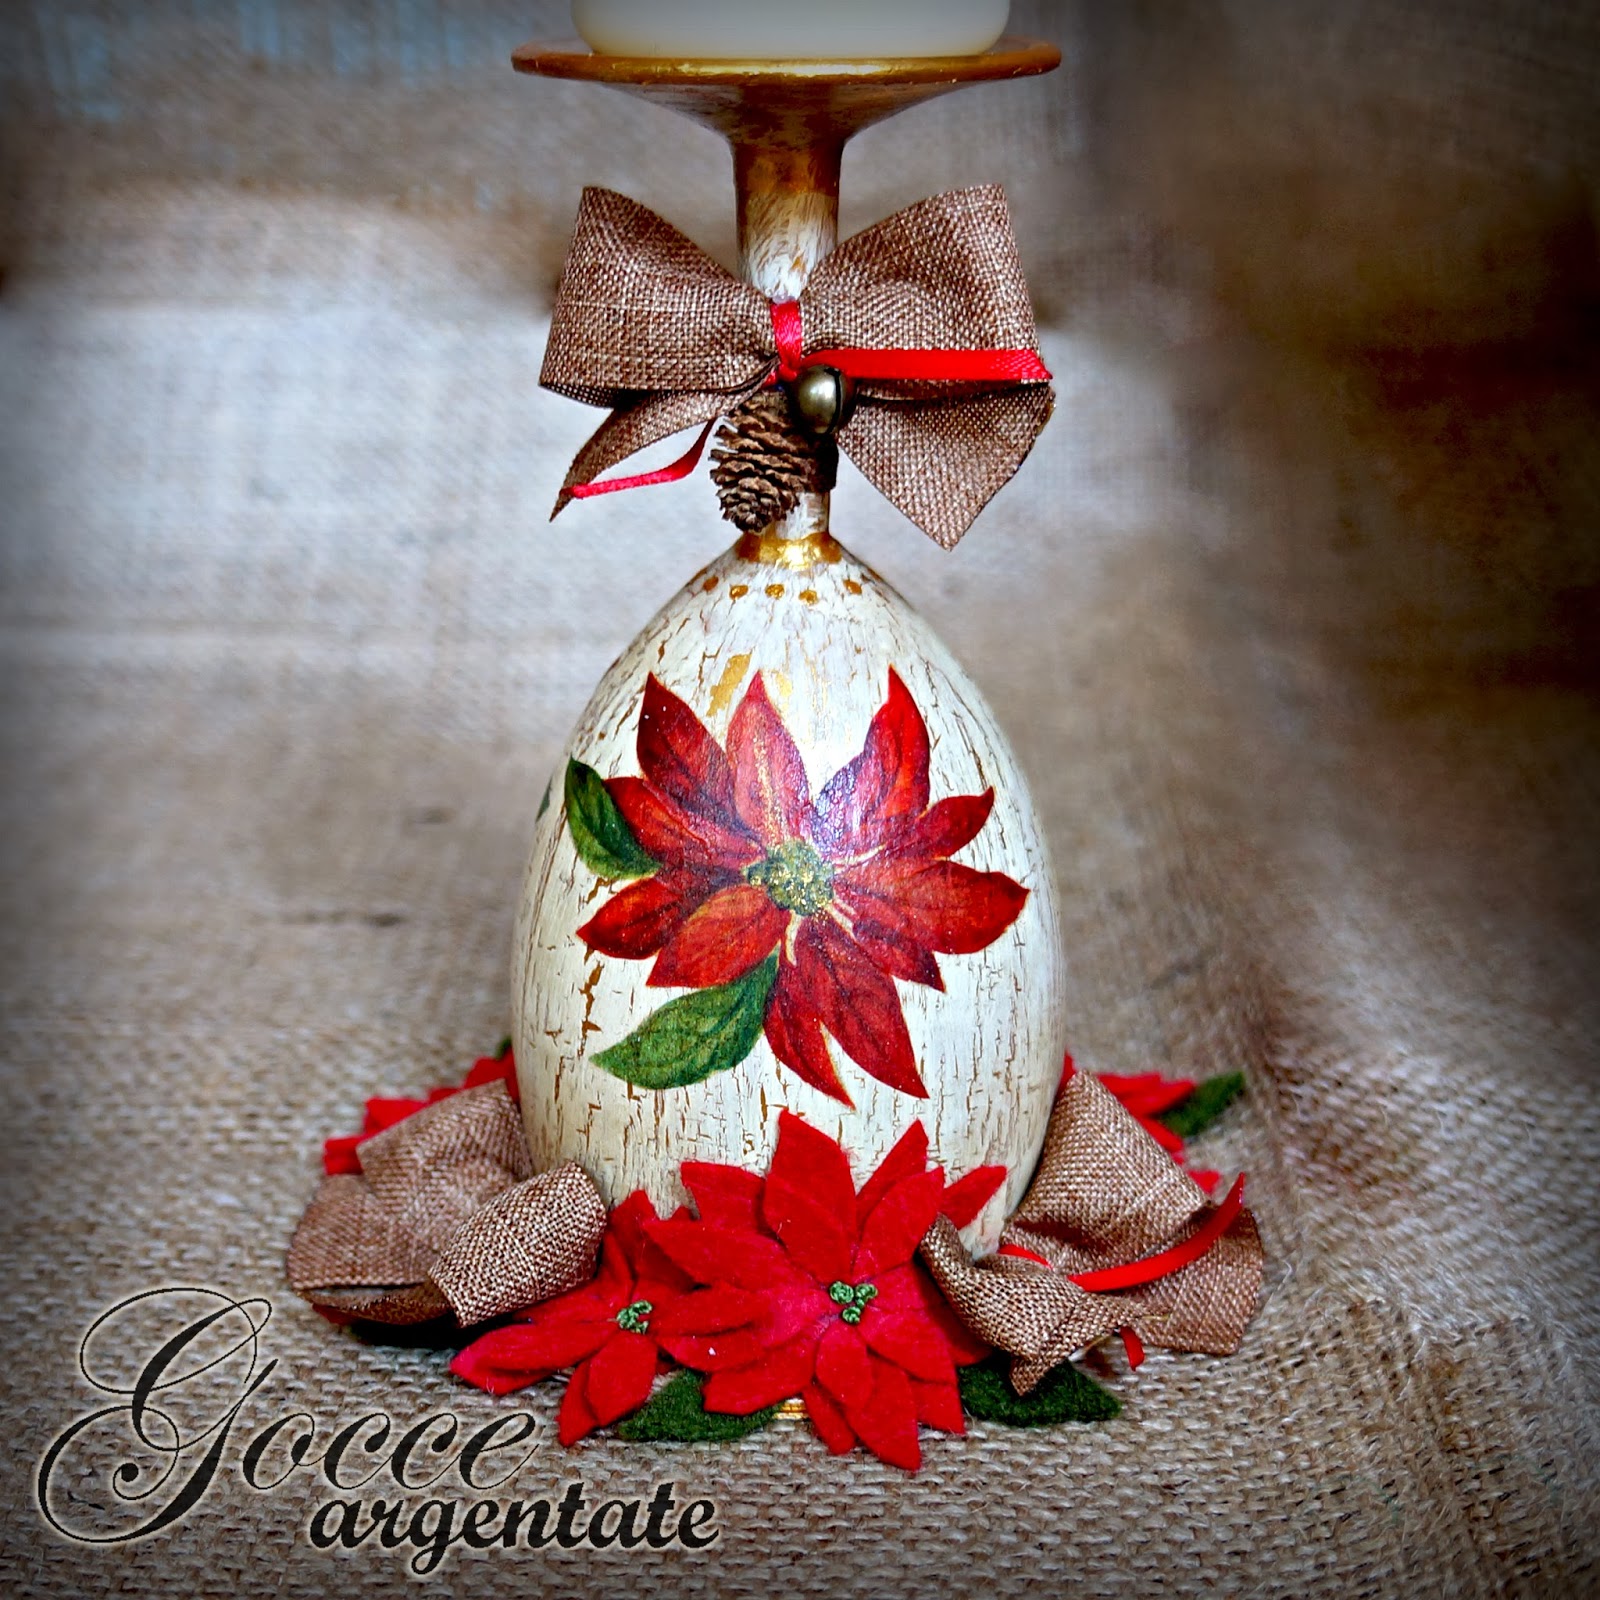
And here is my final creation! I hope you enjoyed this little tutorial. For any questions, just leave a comment below.
Come back soon, and have a wonderful, creative day!

My favorite parties: Under the Table and Dreaming - Between Naps on the Porch - Dwellings - Creatively living - I should be mopping the floor - The Stories of A2Z - Coastal Charm - A Stroll thru Life - My Uncommon Slice of Suburbia – Stone Gable - Cozy little house - Knick of time - Savvy Southern Style - From my front porch to yours
- The charm of home - Ivy and elephants - Green Willow pond - The Brambleberry Cottage - No Minimalist Here - Common Ground - French Country Cottage - Rain on a tin Roof - The dedicated house - It's so very Cheri - My Romantic Home
And here is my final creation! I hope you enjoyed this little tutorial. For any questions, just leave a comment below.
Come back soon, and have a wonderful, creative day!
Featured on:
My favorite parties: Under the Table and Dreaming - Between Naps on the Porch - Dwellings - Creatively living - I should be mopping the floor - The Stories of A2Z - Coastal Charm - A Stroll thru Life - My Uncommon Slice of Suburbia – Stone Gable - Cozy little house - Knick of time - Savvy Southern Style - From my front porch to yours
- The charm of home - Ivy and elephants - Green Willow pond - The Brambleberry Cottage - No Minimalist Here - Common Ground - French Country Cottage - Rain on a tin Roof - The dedicated house - It's so very Cheri - My Romantic Home


P.s. If you don’t want to miss any crafty project, remember to follow the blog by clicking on the “join this site” button in the right column ;-)
No comments:
Post a Comment